Cookies Decorated using Chocolate Transfer Sheets
- with your own photo -
Transfer Sheets are used to decorating chocolates, especially pralines, or cakes with chocolate glaze and other chocolate products.
The chocolate transfer sheets is coated with a thin layer of cocoa butter, on which I can print any image using edible colors and a special printer. You will receive it in the mail in a hard envelope.

- First, carefully cut out the selected pattern - ideally, cut it out in the same shape as is your cake.

Tips:
- When cutting out the picture, remember that if it is smaller than the cake or cookie, it will sink a little into the melted chocolate. This means that you will be able to see the outline of the foil. A circle or a square may look good, depending on the shape of the cake or cookie.

- However, if it doesn´t look too pleasing (maybe a little messy), you can always decorate these edges with icing, or simply design the entire foil with an edge broad enough to cover the entire area of the cake.


- Cover your cake or dip your cookie into melted chocolate.
Tip:
- White chocolate works the best because the colors stand out very well. The printer cannot print white - just like a classic inkjet printer - so we simply used a white chocolate base.


- Now, press the rough side of the foil (shiny out) onto the cake or cookie topped with thick chocolate or chocolate icing.
Tip:
- You can touch the foil if your fingers are perfectly dry, however, you must be careful not to scratch the fine powder.
- Using your fingertips, gently push the foil from the center out to smoothen out any air bubbles. When you are convinced that the picture sits well, place the cake or candy on a grid (or two sticks) and let the chocolate drizzle down. Desserts and sweets decorated using transfer foils can be stored in a refrigerator without any problems.


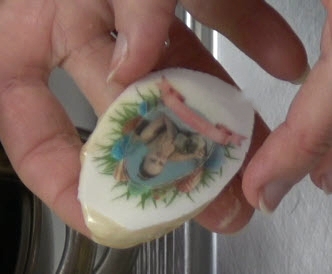
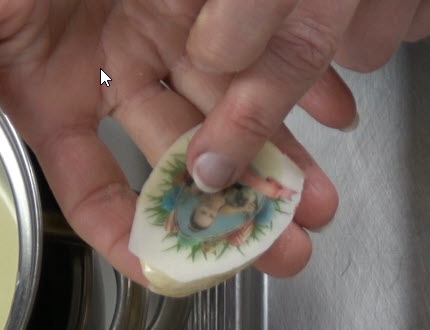
- Only after the chocolate has completely solidified, we can peel off the foil. It´s the most exciting moment when you see the perfect picture underneath!


- If the sheet is larger than the cookie the chocolate will probably stick out to the sides further than to the edges of the cookie. Simply cut it off and smooth out the edges.


The edge can be decorated with chocolate. Larger dots or lines can be made using a pastry bag, small polka dots are simpler, for example, with the head of a pin inserted into a stick or a wooden spoon.
Tip: If you want to transfer the pattern of the transfer sheet to a surface other than chocolate, such as molding and coating materials, then you can use cocoa butter, which has to be melted and rubbed in with the material you want to decorate. The melted cocoa butter will combine itself with the cocoa butter contained in the foil print to transfer the design to the desired surface. Let it cool down and solidify for a while, then carefully remove the foil. You will find more detailed instructions in my next procedure, so if you do not want to miss them, click on the newsletter.
Recommendations regarding transport: Although transfer foils can withstand a lot, they will certainly not benefit from too much heat. Therefore, it is better to send the transfer foils in the colder seasons. Room temperature doesn't matter at all, but excessive heat could melt a layer of cocoa butter and the picture could partially dissolve. Therefore, if you already know that you will need the transfer foil in the hot months, then you should have it sent in the spring when there is no danger of too much heat.
